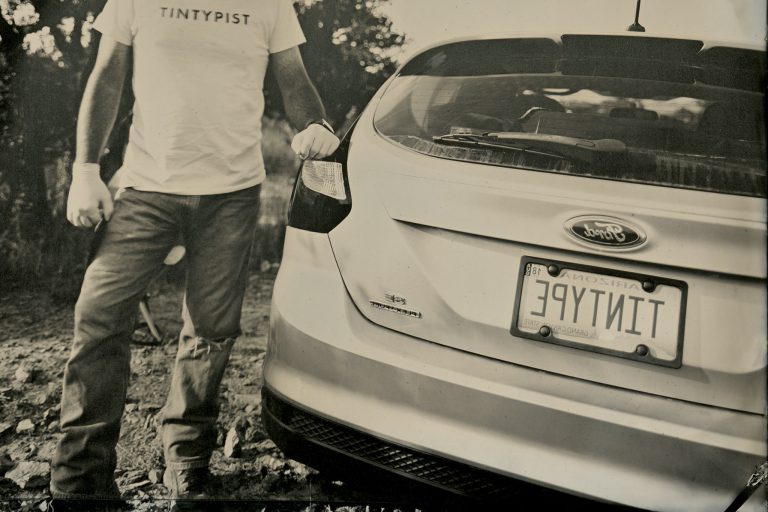
What could be more 21st century than the selfie? How about “a selfie made using state-of-the-art 3D printing, some electronics hacking, and a touch of retro-cool 19th century photography”?
As should be obvious from the rest of my website (for example here, here, and here) I like to make tintype photographs. There is a lot more about tintypes on this page, but the short version is that they are a type of photograph that was common in the second half of the 19th century and they require a non-digital mechanical camera to make. These kinds of cameras did not come with a self timer, nor are they generally easy to hold at arm’s length for the typical selfie.
I also like to goof around with physical computing, using a microcontroller (such as an Arduino), sensors, lights, motors, etc. to interact with the world.
I also recently dived into the world of 3D printing. Bought a relatively cheap printer to stave off boredom – and be able to make something – during the final months of the pandemic. More on that here.
Putting all that together
I’ve been known to make the occasional selfie, so naturally I’d want to be able to make a tintype selfie. I’ve done this in the past, using a bulb release, which is an almost comical contraption that uses a small rubber bulb and a thin tube to send a burst of pressurized air to the cable release on the shutter.
There are many drawbacks to bulb releases.
One, your remote is physically connected to the camera, and hence limited by the length of tubing. In my case that is theoretically 12 feet. But I don’t really want that tube visible in the image, so I usually let it drape to the ground (around 4 feet from the camera) and snake through the grass or whatever to my foot, hopefully mostly out of sight.
All of that subterfuge costs length, too. In other words, the only way you’d get 12 feet away from the camera is to stretch the tubing straight out, and have it – and your hand or whatever – clearly visible in the image. And on top of that, I might want to be more than 12 feet away from the camera!
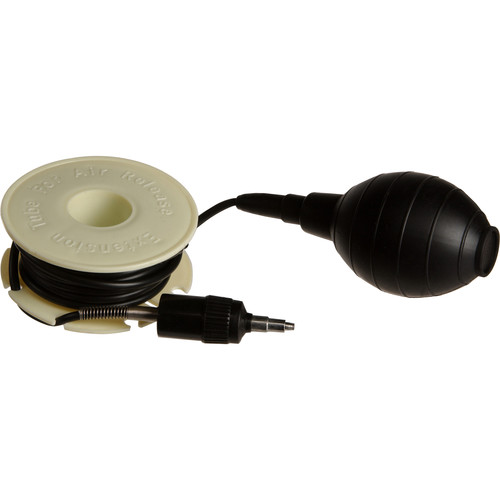

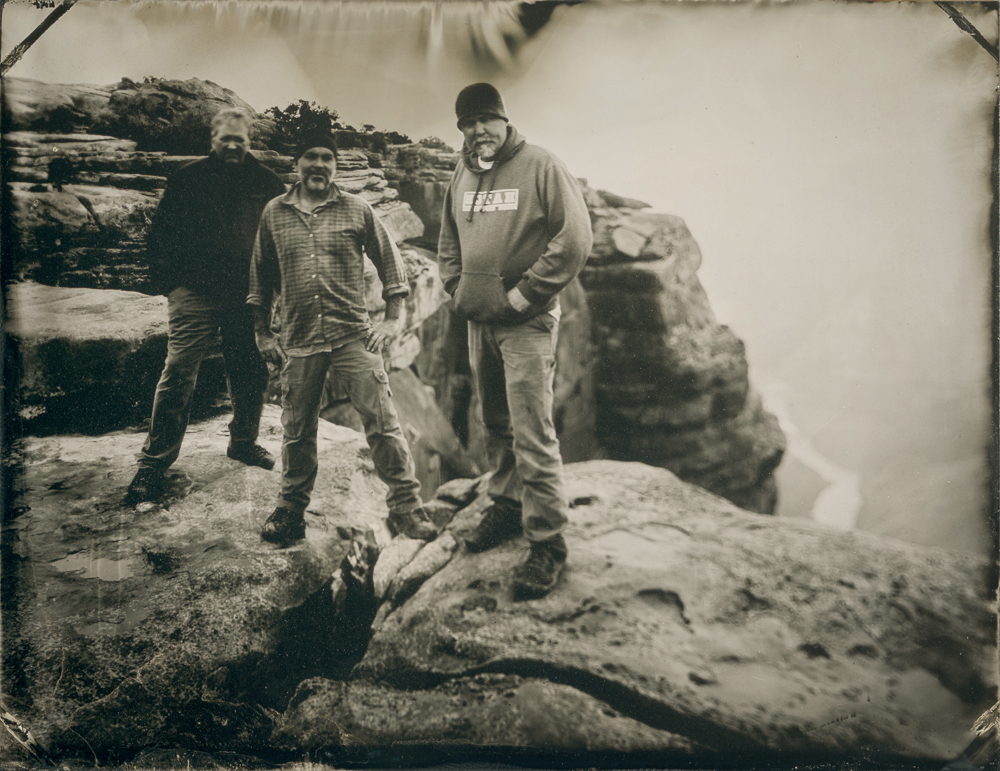
Secondly, you have to physically squeeze the bulb to release the shutter. In my experience, that requires so much effort that I move my whole body, resulting in blurred images. With wet plate and its seconds-long exposures that may not matter, but in any case it is not ideal. When I made this tintype I had to really stomp on the bulb – since it was in grass and soft soil – but fortunately that didn’t really matter for that particular image.
Finally, bulb releases are about as basic as it comes in comes in terms of functionality. You can squeeze it to push the shutter. If you really try hard you might be able to keep it squeezed – without air leaking out – to keep the shutter open for a (short) bulb exposure. That’s about it. Not easy to trigger, hard to keep open, and no self timer or any other more advanced functionality that is common with modern cameras.
There are, of course, timer releases for these old cameras. I don’t have one myself, but from what I gather they are generally mechanical devices that use springs and gears to release the shutter. As far as I know, they trigger it once after a fixed amount of time, say, 10 seconds.
Needless to say, none of that is ideal, at least to my thinking.
I have a shutter remote for my Canon DSLR that has several different modes: time delay, intervals, long exposure, and multiple exposure, and they can all be used in any combination. I was on a five day hike once during one of the big meteor showers, but the peak was at something like 2am. After a day of lugging a 45 pound pack around the Tetons, 2am would have been about 5 hours after I passed out from exhaustion. So I programmed the remote to wait four hours, then make a bunch of 30-second exposures every couple of minutes. Laziness plus technology for the win! (Ok, I didn’t get any great shots, but I did sleep just fine.)
So those things are pretty great, except for the fact that Canon should really build all of that into the camera – it’s just code, no physical parts – instead of charging $130 for an accessory (yeah, there are cheaper options out there these days).
Microcontroller electronics
Once I learned how to do some basic microcontroller coding I realized I could replicate that functionality for large format cameras! My device has the following functions:

- Simple shutter release. This could work either as a fractional second set on the camera’s actual shutter, or in the T mode (click to open, click again to close).
- Bulb release: the shutter is held open for however long the user presses the button.
(Neither of those are particularly useful by themselves, as they don’t do anything that a normal cable release doesn’t already do, but they would be very useful in combination with the wireless radio remote. More on that below.)
- Programmed exposure: the shutter is held open for however many seconds the user sets for the exposure. This could be very useful for anyone – especially wetplaters – doing long exposures of many seconds. I don’t use it (I prefer my method of counting hippopotamuses or mississippis) but if one was more particular about precise and repeatable exposure durations this would be useful.
- All of those functions can also be triggered by a variable time delay. (Not just limited to the usual 10 seconds.)
The latter is where it gets particularly useful to me. Real-world example: I could set it for a 20 second delay, then an 8 second exposure. When I press the main button I would have 20 seconds to get into place, then the camera would make an 8 second bulb exposure.
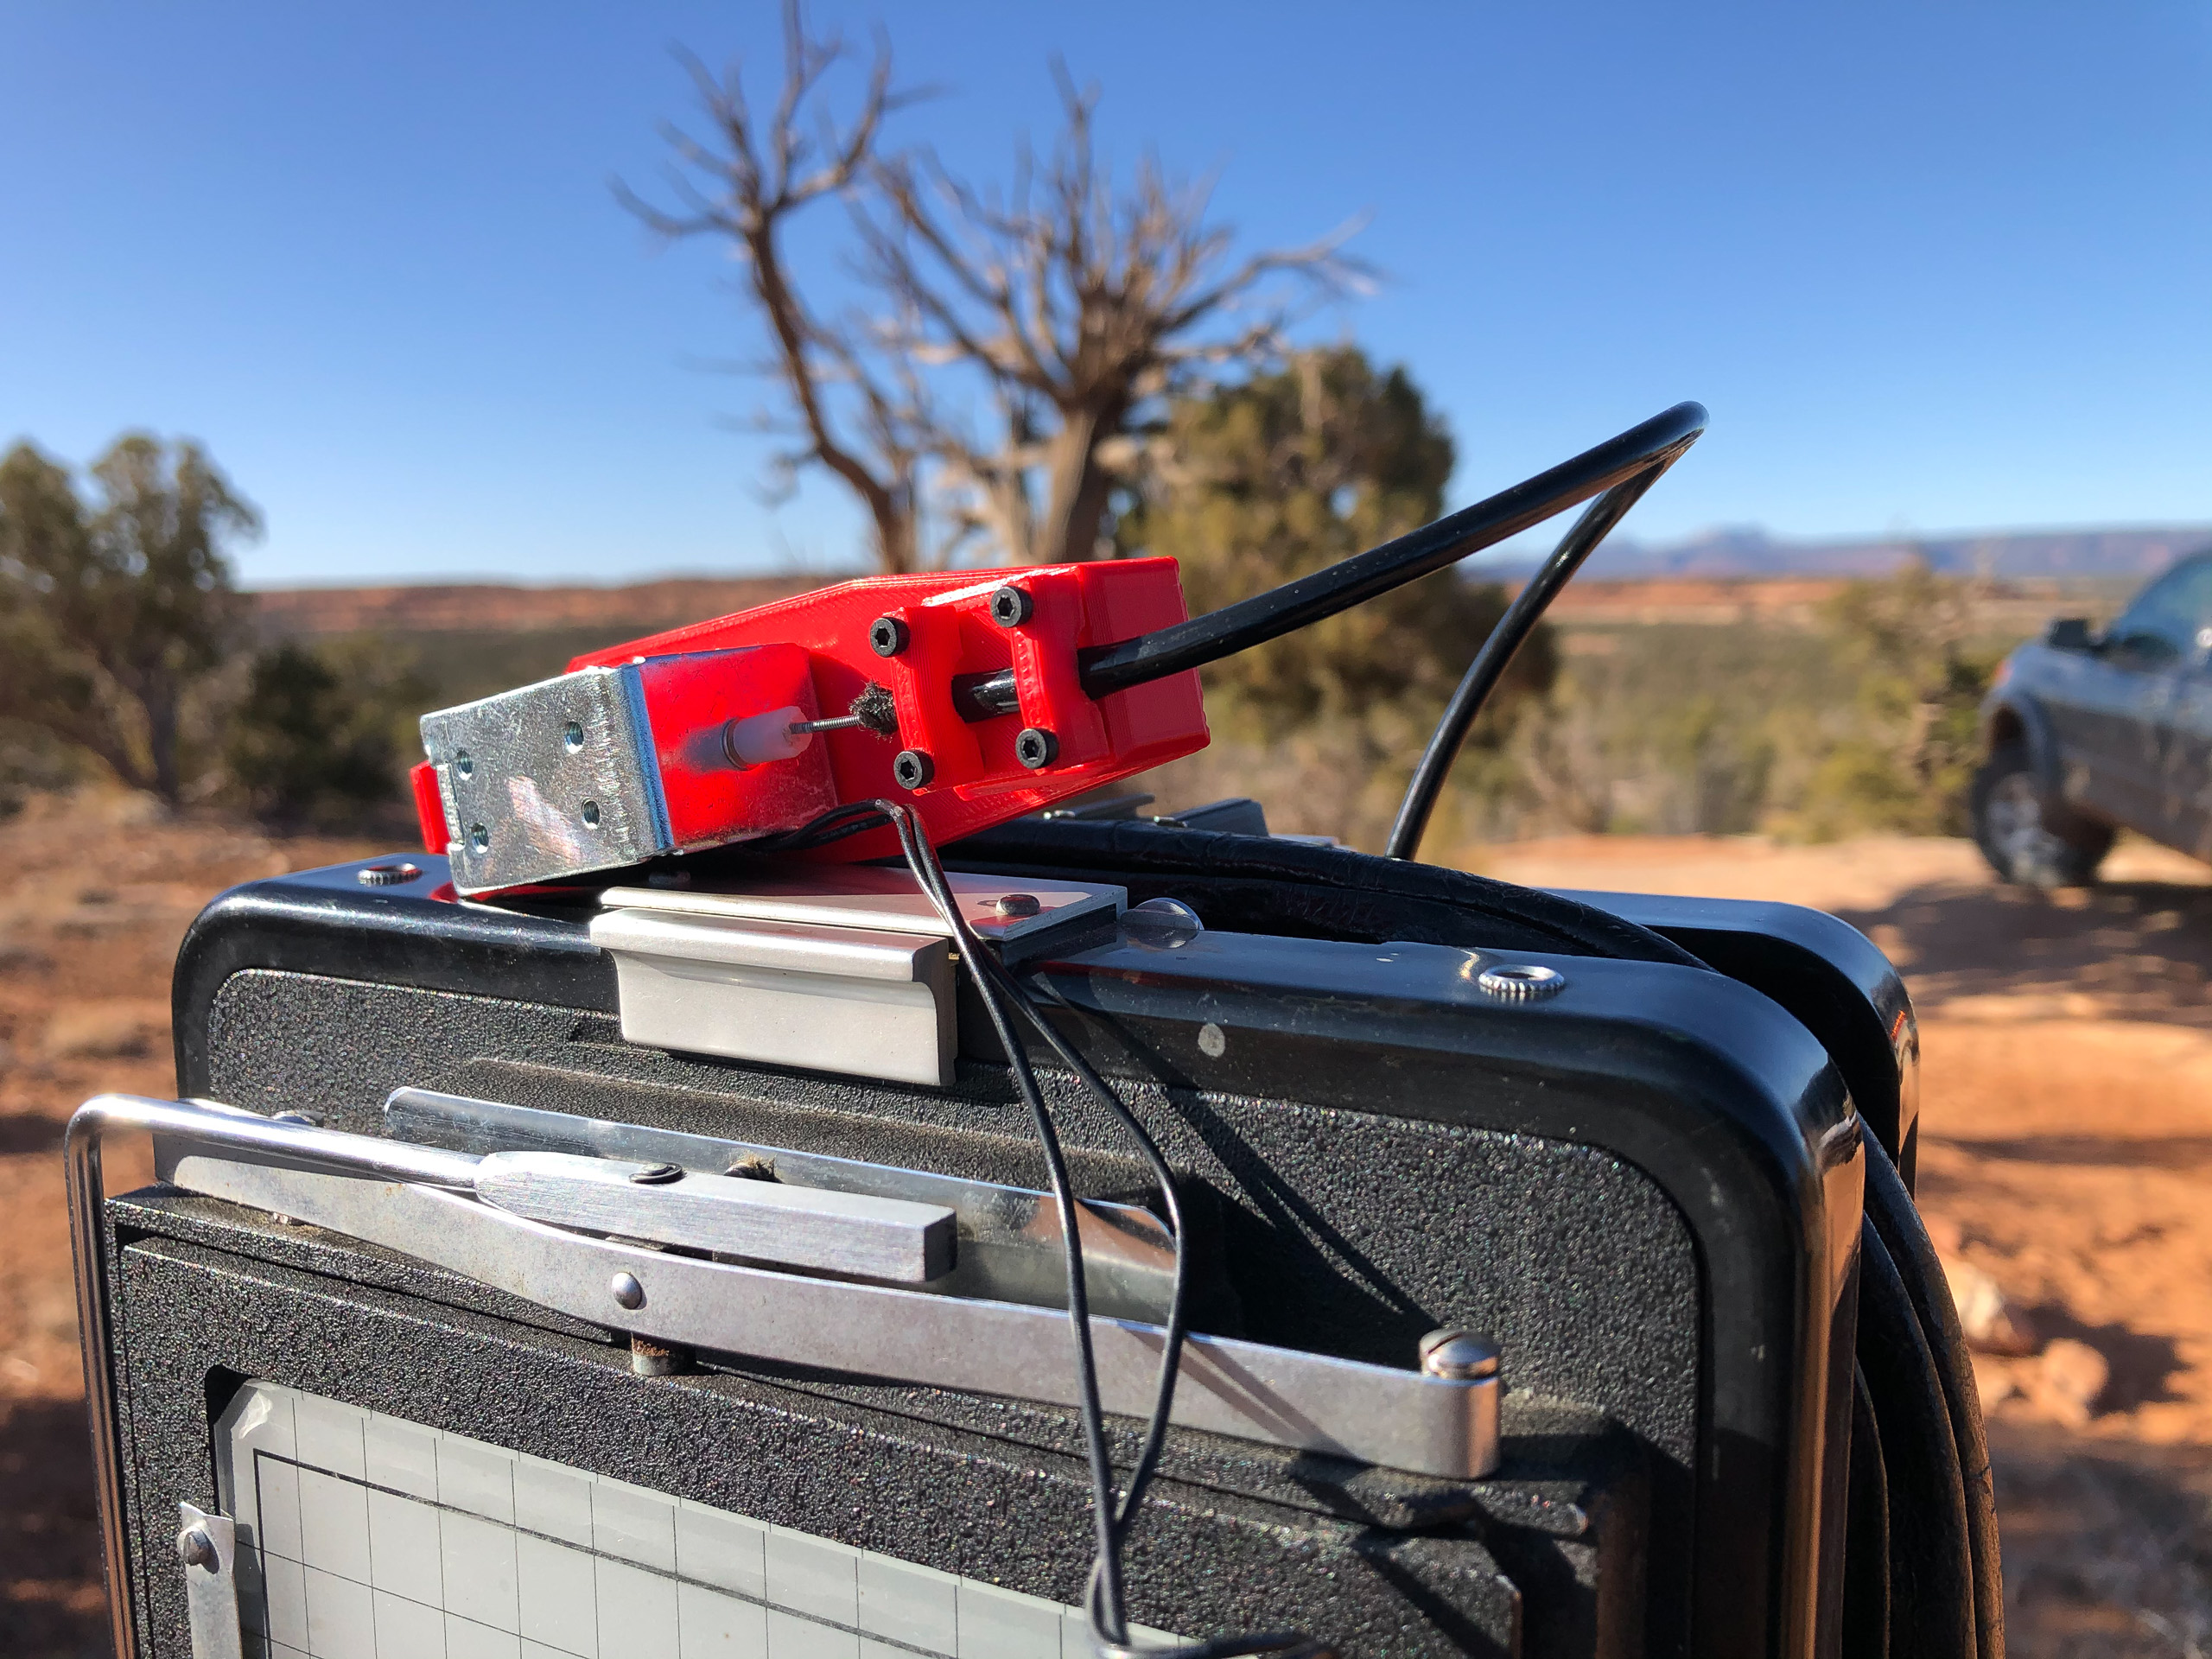
In any case, when the shutter should fire, an electrical signal is sent to a solenoid that pushes the cable release just like your finger would. This would work for instantaneous pushing, as well as bulb exposures that could last until the battery dies or the solenoid burns out…not sure how long that would take.
I might have programmed in a T mode, too, but I can’t remember (and the device is packed away). This would allow the shutter to fire and the solenoid to release while the microcontroller counts the seconds and then pushes again to close the shutter. This would reduce battery consumption and avoid burning out the solenoid.
3D Printing
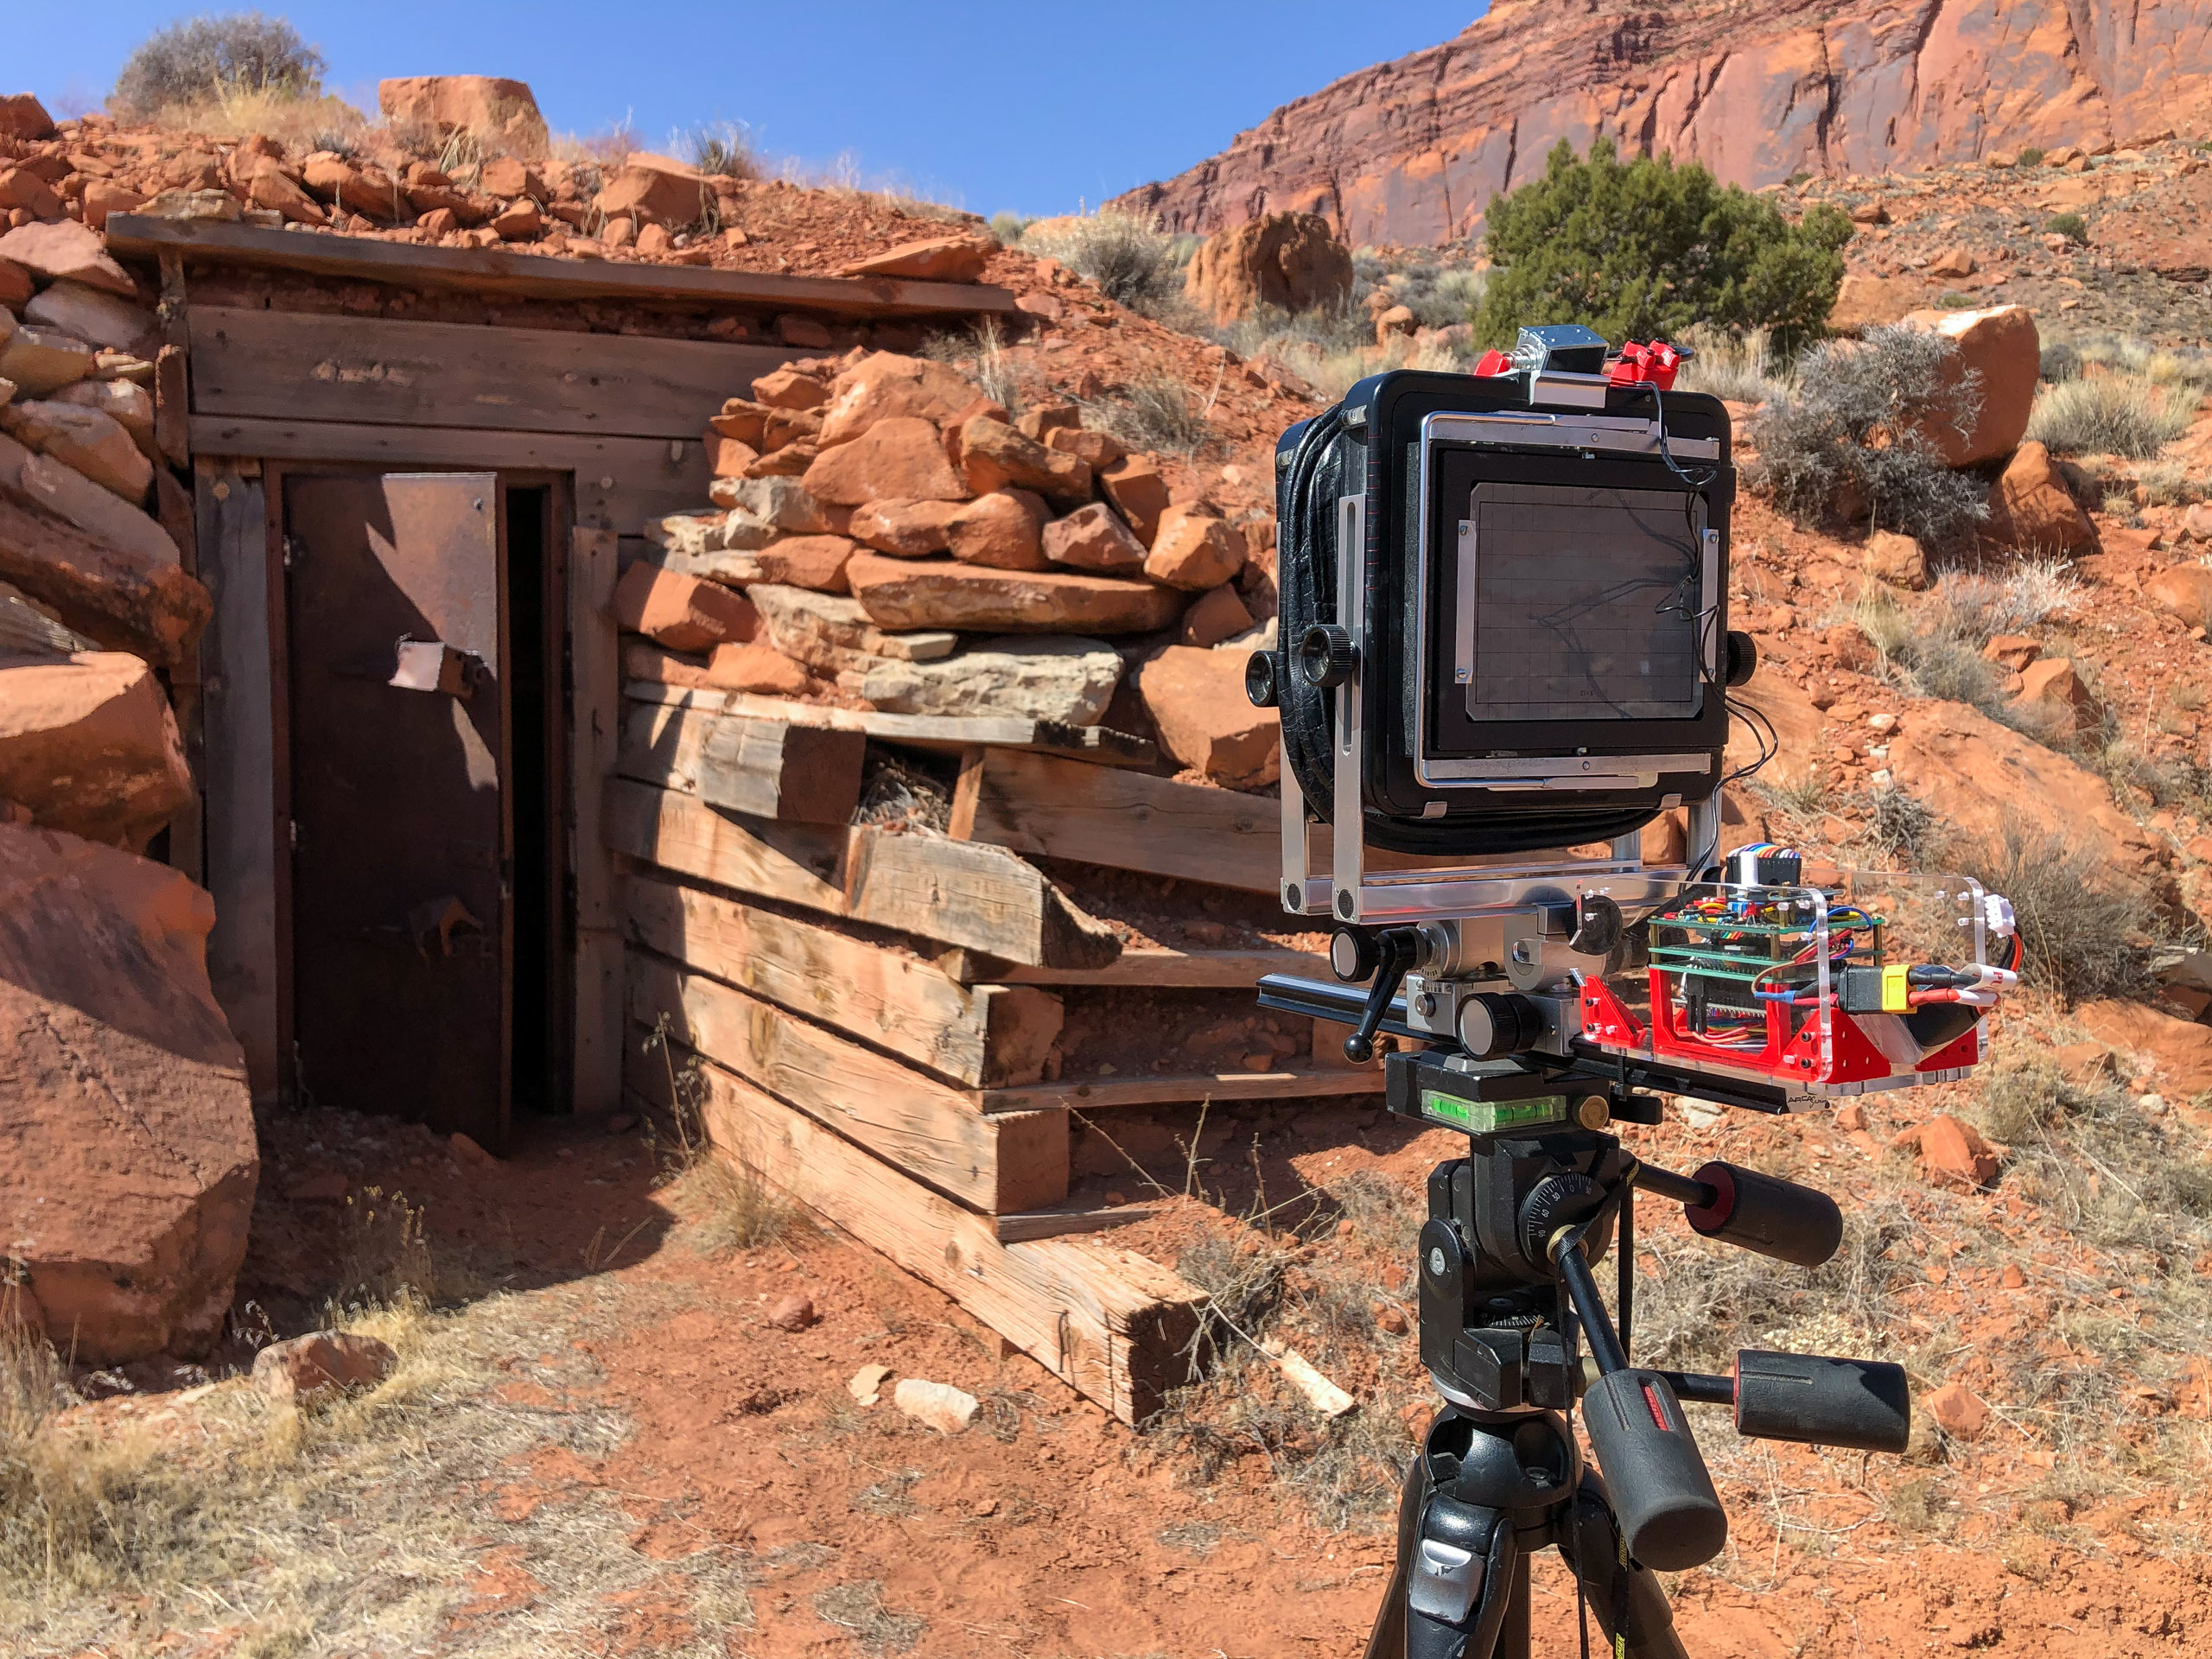
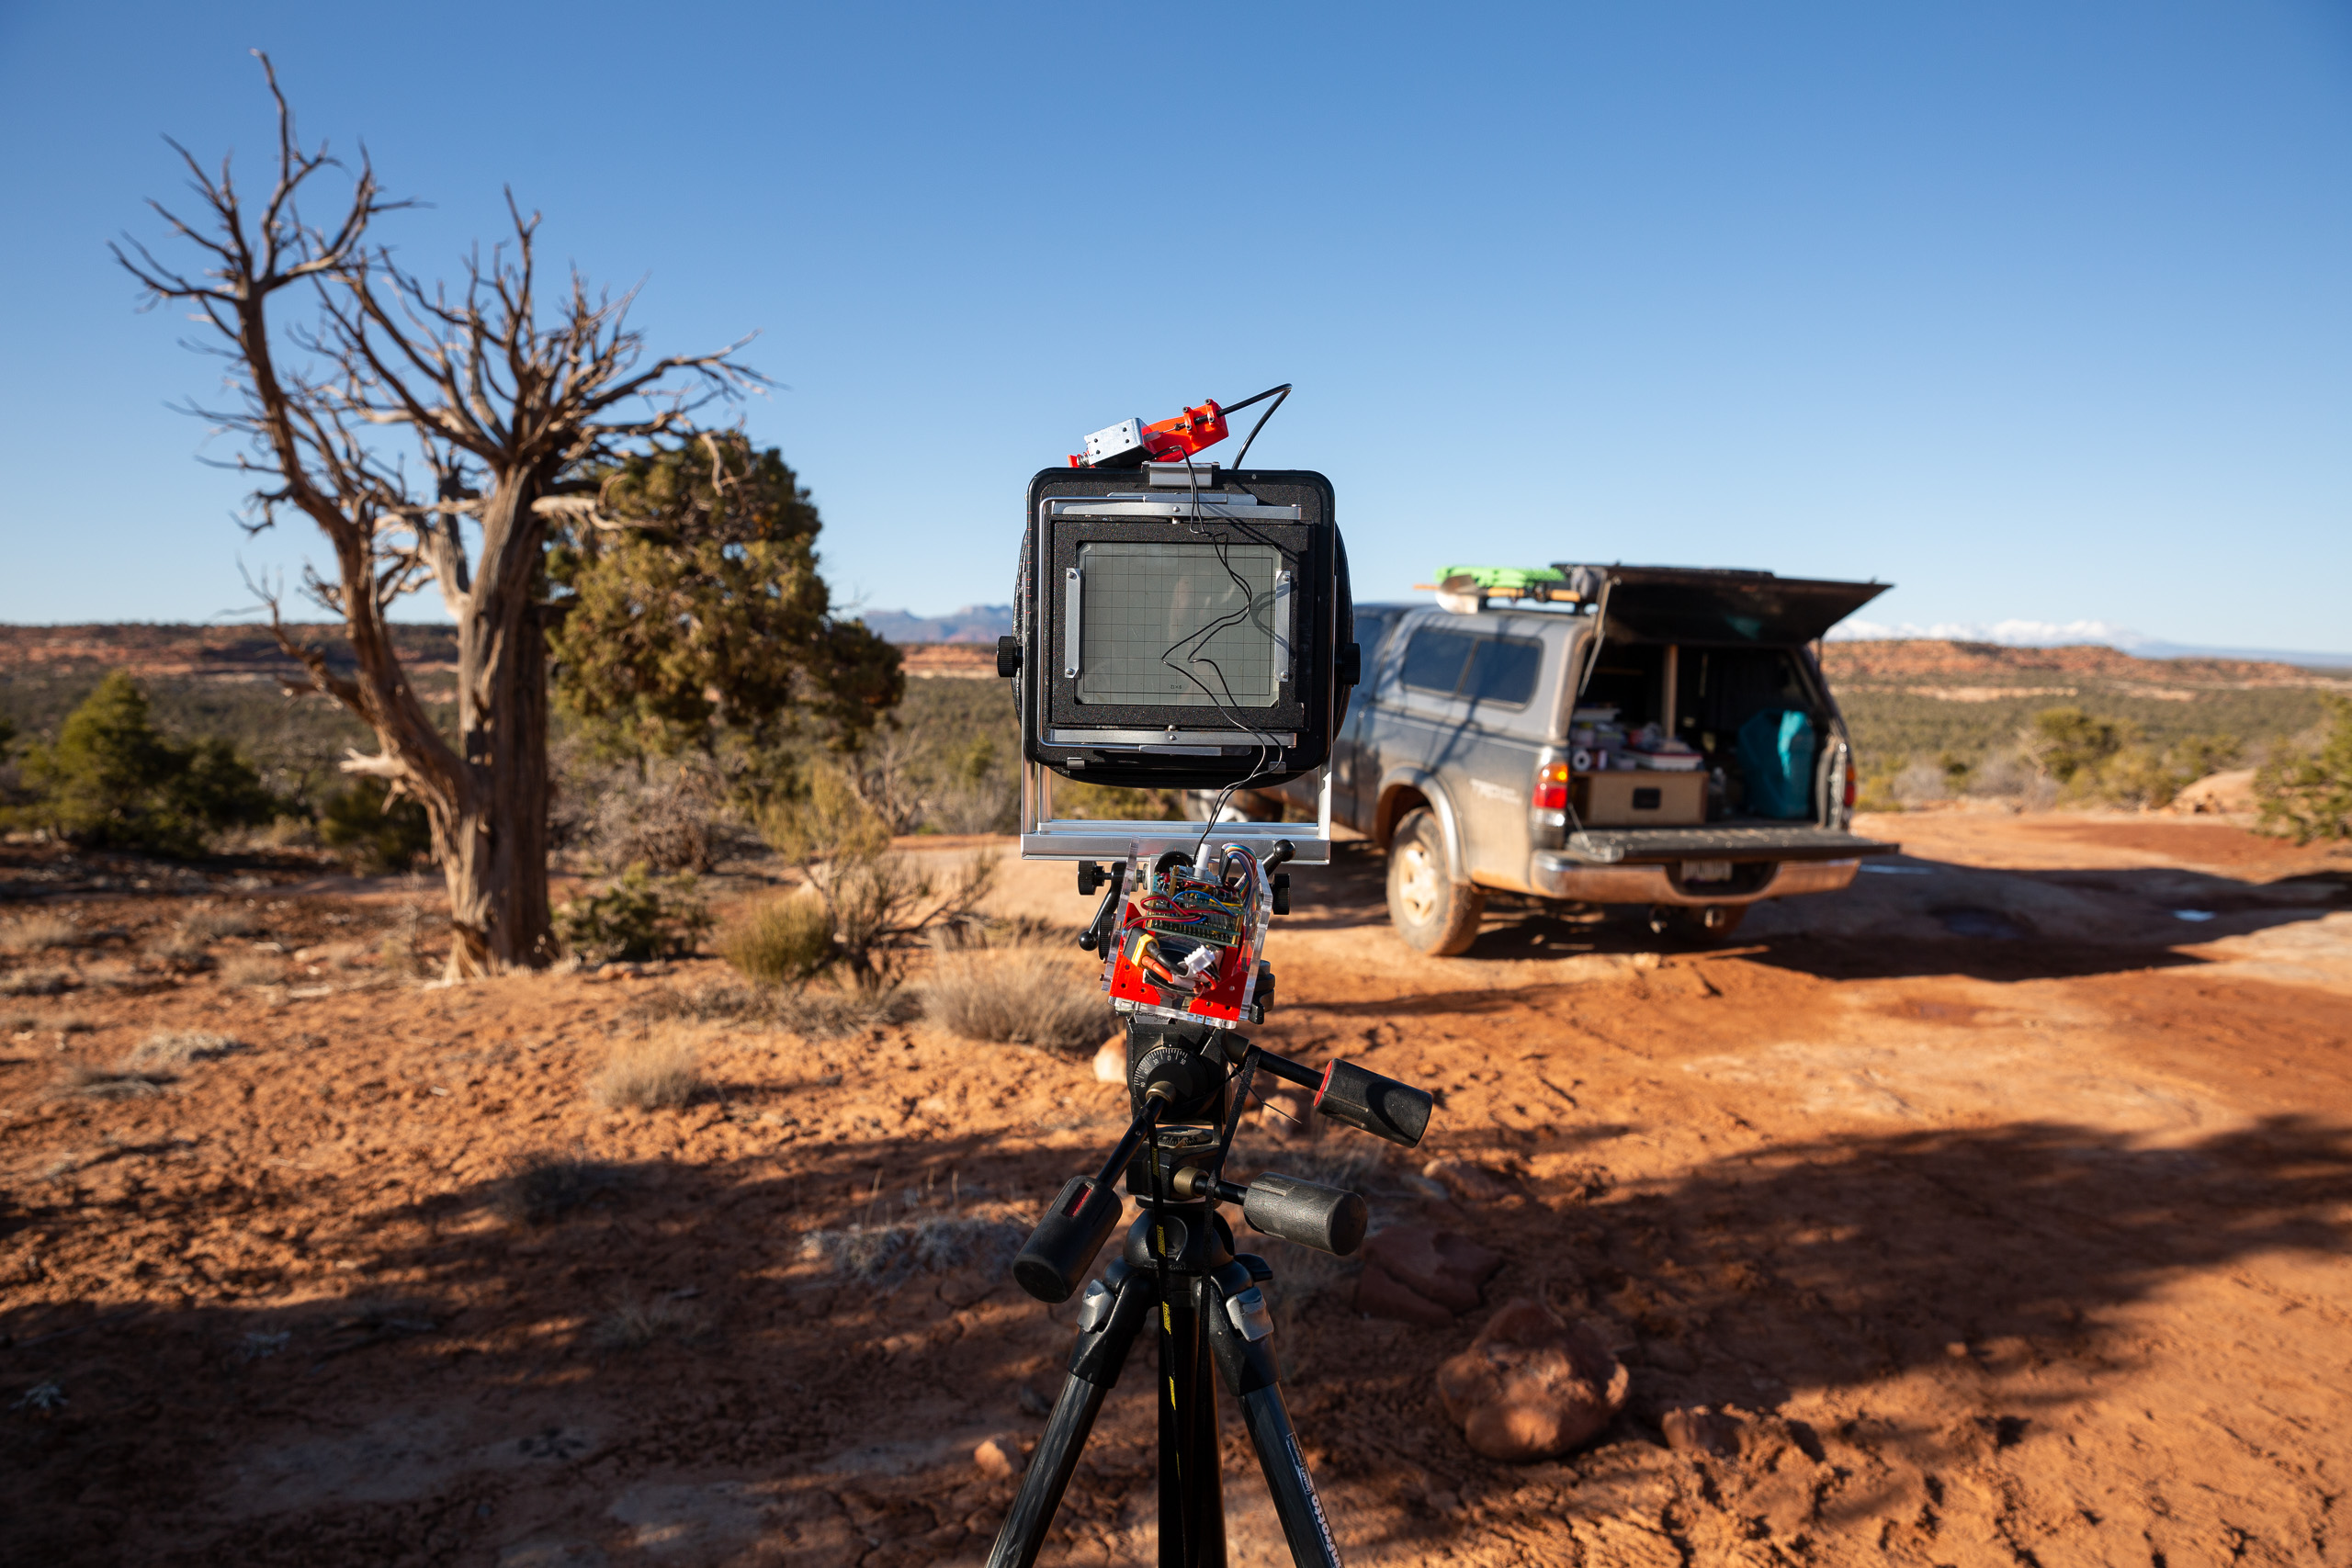
I really haven’t done much with the 3D printing for this project. As I mentioned earlier, I’m not very good with the electronics hardware design, and all of that is way bigger than it should be. In fact, pretty sure it should just be a smartphone app. So for now I’m not putting too much time into printing a housing, but here’s what I have just for my own use.
There are two parts:
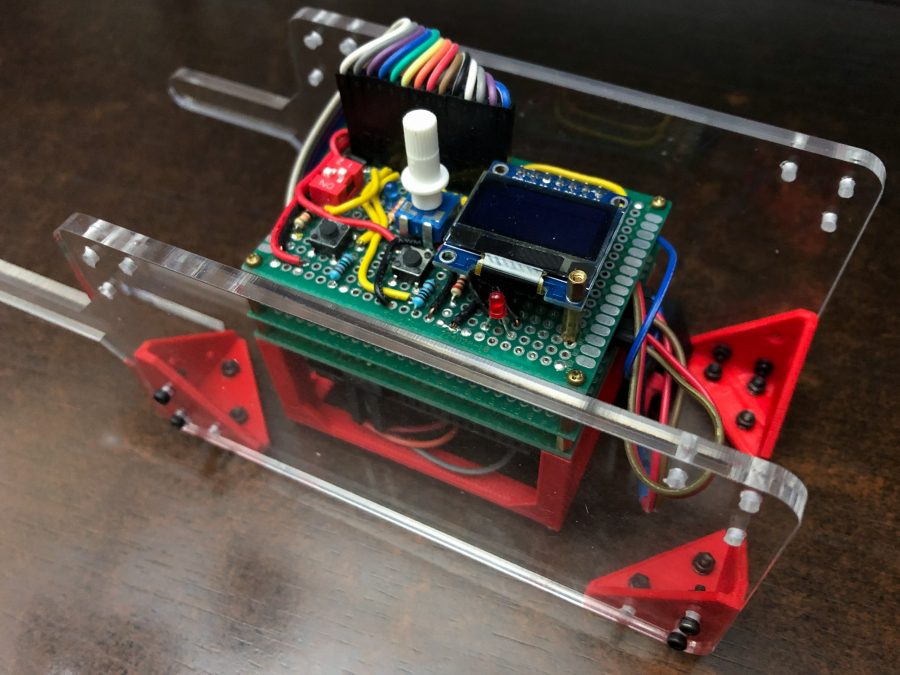
Housing for microcontroller: this is really ghetto. I just wanted something to hold it together so the connections don’t pull apart, and so I have something to use to attach it to the camera / tripod somehow. Printing a large enclosure would take several hours, and wouldn’t be see-through. I had a few pieces of acrylic I scavenged from a scrap bin, so I just printed some corner braces and left it at that.
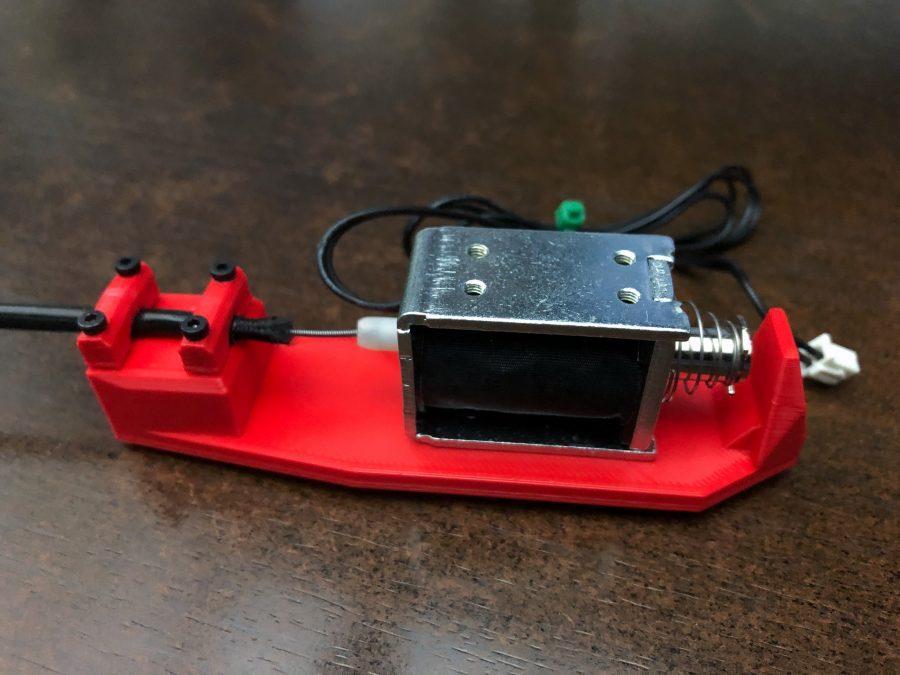
Mount for the solenoid and cable release: this is slightly more important / useful. I needed a way to securely hold the solenoid and the cable release, since it all moves with quite a bit of force. All I did for the cable release was get a cheap one off eBay and cut the plunger portion away, then glued the inner cable to the solenoid – this is not a strong connection, and I needed the whole mount to be solid so it wouldn’t fly apart when the solenoid is triggered.
All in all it looks pretty amateur hour, and any electrical engineer, mechanical engineer, or product design specialist would be embarrassed by the results, but it works and I made it and that’s cool enough for me for now!